Access Control plays a critical role in almost every user facing application, but especially in scenarios where sensitive information is involved. It plays an instrumental role in guarding sensitive information, ensuring that it remains within the reach of only those individuals who have been granted the required permissions.
In the case of RAG applications, it's quite possible that not every user is granted equal access to all indexed documents. Certain pieces of information could be of a confidential nature, accessible only to specific roles or designated individuals - and it’s critical that our RAG application doesn’t leak any sensitive information. This highlights the necessity for strong and effective access control mechanisms. By preventing unauthorized access, these mechanisms help retain the confidentiality of data.
In Pinecone, you could use metadata to associate users and roles with specific vectors, but this doesn’t satisfy the core architectural tenant of separation of concerns: systems shouldn’t be overloaded with “foreign” consideration, if it could be avoided. As we’ll explore in this post, RAG use cases are ideal for a post-query filtering flow, and this flow lends itself to managing the authorization mechanism outside of the database itself.
Authentication and Authorization
Before we jump into the specific implementation of access control for RAG application, let’s take a moment to talk about its components, namely authentication and authorization.
- Authentication is the process of verifying a user's identity. This usually involves the user providing some form of credentials, like a username and password. If the credentials match what's stored in the system, the user is authenticated and granted access.
- Authorization is the process of determining which resources are available to a given identity. There are several popular paradigms used for authorization:
- Access control lists (ACL) - access to a resource is determined by the list of users that are granted permissions to it. This is a simple model that is easy to understand and implement, but it can become difficult to manage as the number of users and resources grows.
- Role based access control (RBAC) - access is granted based on the role of the user. For example, an 'admin' role might have access to everything, while a 'guest' role might have very limited access. This model is more flexible and scalable than ACL, but it can still be complex to manage.
- Attribute based access control (ABAC) - access is granted based on a combination of attributes. These attributes can be associated with the user (like role, department, location), the resource (like type, sensitivity, location), the action (like read, write, delete), and the context (like time, network, device). This model offers the most flexibility and scalability, but it can also be the most complex to manage.
- Relationship based access control (ReBAC) - a more recent model where access is granted based on the relationships between the user and the resources. For example, in a social networking application, a user might have access to resources that are 'connected' to them in some way (like friends, followers, etc). This model can handle complex access control scenarios, but it can also be complex to implement and manage.
Access control for RAG applications
Now that we have a good idea of what authentication and authorization are, let’s see how we can apply them in the context of a RAG application. Roughly speaking, we can break down any RAG system into two phases: ingestion and querying.
- During the ingestion phase, we’ll have to associate the identities known to our system with the resources they are allowed to access.
- During the querying phase, we’ll have to resolve which of the documents an identity attempts to access are allowed and which can’t be included in the final response.
In order to demonstrate a rudimentary authorization flow for RAG application, we’ll apply the ReBAC model, and here’s why: RBAC and ABAC are mostly geared towards managing application resources such as endpoints. For example, when we build an application and we want to determine which user or role can carry out a particular action that maps to an endpoint. In the case of RAG, the predominant pattern for authorization is filtering the results after the query is executed. This requires us to create relations between users or roles and resources.
Practically speaking, for a set of documents, we’ll define a set of possible categories. We’ll assign users in our system to those categories, and allow them to access only the documents which belong to their assigned categories.
We’ll use the same RAG application we covered in our a previous post, and extend it with authentication and authorization capabilities (full code listing).
To facilitate the authentication and authorization processes, we’ll use two services:
- Clerk - a user authentication platform that developers can use to manage user access in their applications. It provides features such as sign-in services, two-factor authentication, session management, and user management, helping secure your application and protect user data.
- Aserto - a permissions-as-a-service platform that developers can use to incorporate authorization into their applications. It provides features such as policy-based permissions, role-based and attribute access control, as well as relationship-based access control - making it easier to manage who has access to what in your application.
First, we sign up for a Clerk account and create a set of users:
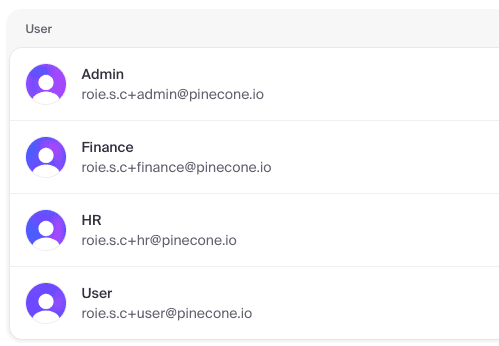
We want to flag the “Admin” user as having some extra permissions here, so we’ll add some private metadata to the user entry:
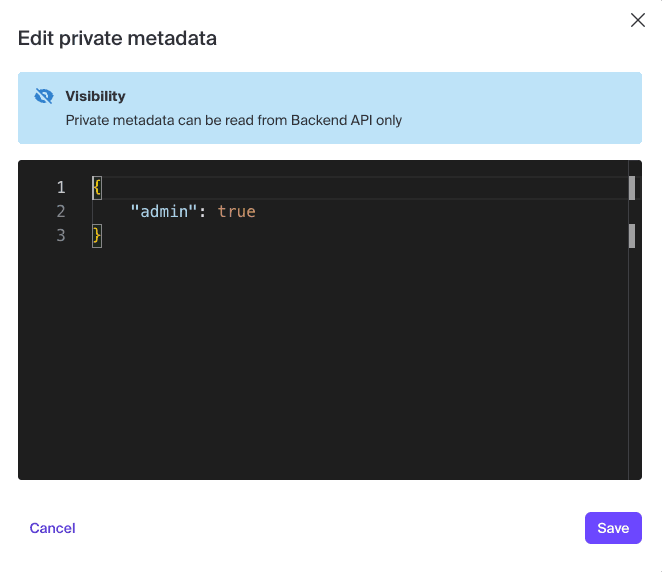
For the purposes of this example, the admin will be the user with the ability to assign categories to specific users. In more realistic scenarios, we’ll probably want to associate a category with a role or a group as opposed to a user - more on that later.
When the admin user is logged in to the application, they’ll see the following control:
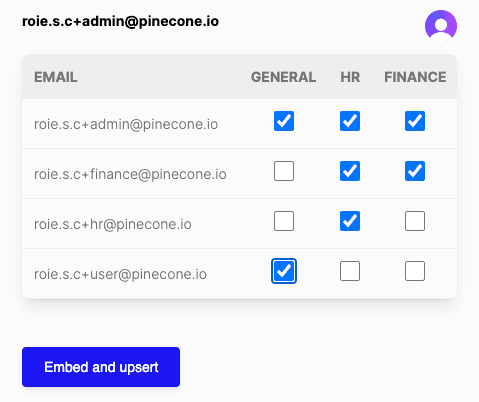
This will allow them to select which categories are assigned to each user.
Next, we’ll need to associate the identities of each user with the documents we’re going to index. We’ll do this using Aserto’s directory service.
💡 The Aserto Directory
The Aserto Directory stores information required to make authorization decisions. It is flexible enough to easily support different access control strategies including Role-Based Access Control (RBAC), Attribute-Based Access Control (ABAC), and Relationship-Based Access Control (ReBAC).
An authorization decision is an answer to the question "Is subject S allowed to perform action A on resource R?" In other words, authorization decisions determine whether a subject (user, group, service, etc.) has a given permission on a resource (document, folder, project, etc.).
It is convenient to think of the Aserto Directory as a graph in which objects are the nodes and relations the edges. Under this model, the authorization question in the previous section can be rephrased again as "Is there a path from the node S to the node R in which one or more edges have permission P?"
For example, a resource object type can define the can_read, can_write, and can_delete permissions, and have these granted through the owner, editor, and viewer relations.
Additionally, we can define permissions: A permission represents a kind of action that a subject may perform on a resource. Similar to relations, each permission is defined in the manifest as part of an object type definition.
Unlike relations, permissions cannot be assigned explicitly. They are granted indirectly by combining relations and/or other permissions using permission operators.
Aserto allows us to define our authorization model in a manifest file:
# yaml-language-server: $schema=https://www.topaz.sh/schema/manifest.json
---

# model
model:
  version: 3

# object type definitions
types:
  # user represents a user that can be granted role(s)
  user:
    relations:
      manager: user

  # group represents a collection of users and/or (nested) groups
  group:
    relations:
      member: user | group#member

  # identity represents a collection of identities for users
  identity:
    relations:
      identifier: user

  # resource creator represents a user type that can create new resources
  resource-creator:
    relations:
      member: user | group#member

    permissions:
      can_create_resource: member

  # resource represents a protected resource
  resource:
    relations:
      owner: user
      writer: user | group#member
      reader: user | group#member

    permissions:
      can_read: reader | writer | owner
      can_write: writer | owner
      can_delete: owner
Here’s a visualization of this manifest file:
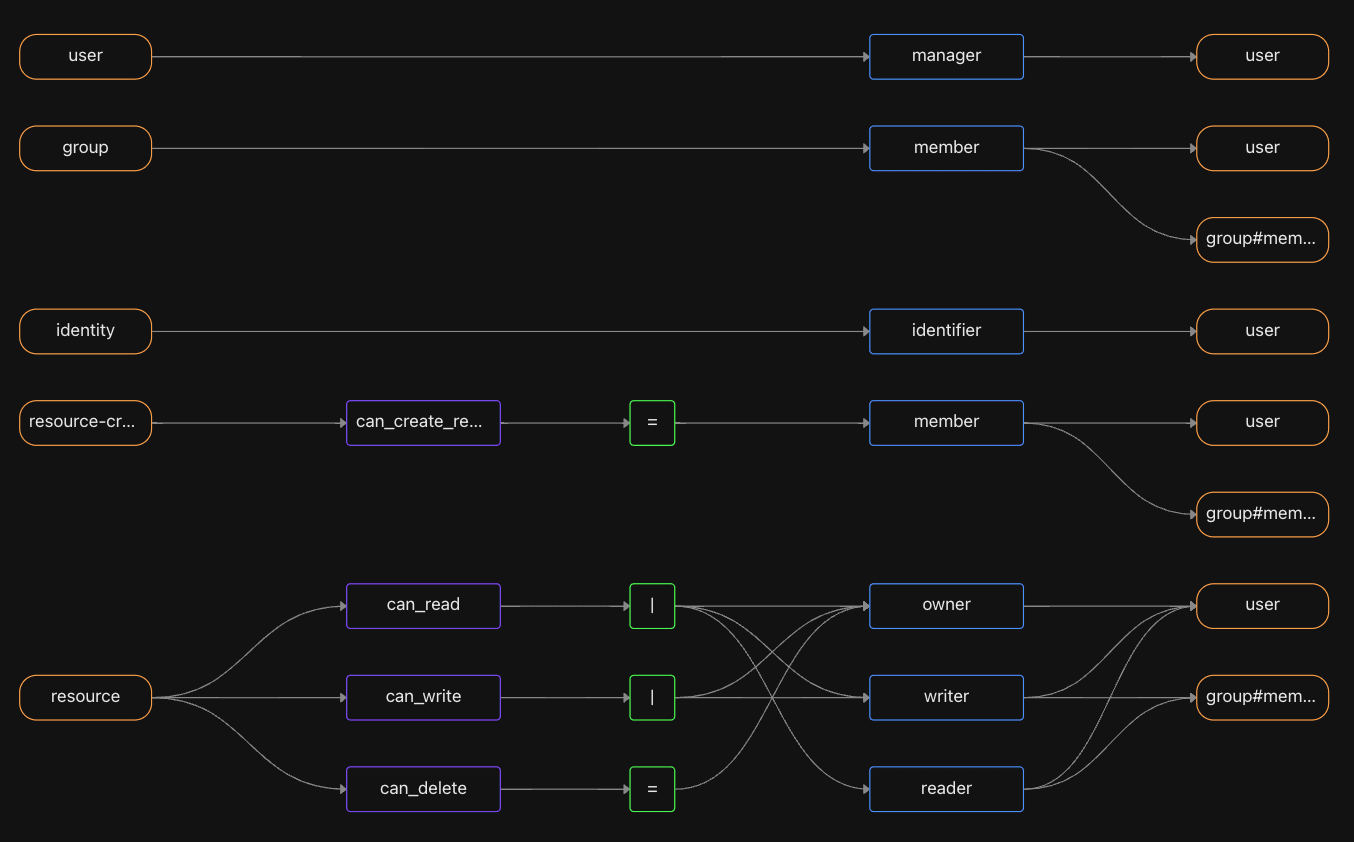
When creating a new project with Aserto, we can start with this initial model that can be useful in a variety of use cases. Naturally model can evolve as our application changes and grows over time.
Ingestion
As with other RAG ingestion processes, we iterate over each document, embed it and upsert it into Pinecone. But in our case, we will also associate the document with its category and we’ll create a relationship between the documents and the users in the system, based on the mapping we get from the application.
const index = pinecone.Index(indexName)
const vectors = await Promise.all(documents.flat().map(embedDocument));

  await Promise.all(Object.keys(usersDataAssignment).map(async (userId) => {
    const userVectors = filterRecordsByUserAssignments(userId, vectors, usersDataAssignment)
    const userObject = await clerkClient.users.getUser(userId);
    return assignRelation(userObject, userVectors, 'owner');
  }));
  // Upsert vectors into the Pinecone index
await chunkedUpsert(index, vectors, '', 10);
In this bit of code, we iterate over the userDataAssignment that associates each user in the system with the categories they are allowed to view. We filter all the vectors we created and associate those vectors with their corresponding user.
Let’s look at the function which creates the relationship between a user and a document:
export const assignRelation = async (user: User, documents: PineconeRecord<CategorizedRecordMetadata>[], relationName: string) => {
  // Map each document to a set of operations for setting up user-document relations
  const operations = documents.map((document) => {

    // Construct a display name for the user
    const userName = `${user.firstName}${user.lastName ? ' ' : ''}${user.lastName ?? ''}`
    // Create a user object for the directory service
    const userObject = {
      id: user.id,
      type: 'user',
      properties: objectPropertiesAsStruct({
        email: user.emailAddresses[0].emailAddress,
        name: userName,
        picture: user.imageUrl,
      }),
      displayName: userName
    };

    // Create a document object for the directory service
    const documentObject = {
      id: document.id,
      type: 'resource',
      properties: document.metadata ? objectPropertiesAsStruct({
        url: document.metadata.url,
        category: document.metadata.category,
      }) : objectPropertiesAsStruct({}),
      displayName: document.metadata && document.metadata.title ? document.metadata.title as string : '',
    };

    // Define the relation between the user and the document
    const userDocumentRelation = {
      subjectId: user.id,
      subjectType: 'user',
      objectId: document.id,
      objectType: 'resource',
      relation: relationName,
    };

    // Operations to set the user and document objects in the directory
    const objectOperations: any[] = [
      {
        opCode: ImportOpCode.SET,
        msg: {
          case: ImportMsgCase.OBJECT,
          value: userObject,
        },
      },
      {
        opCode: ImportOpCode.SET,
        msg: {
          case: ImportMsgCase.OBJECT,
          value: documentObject,
        },
      }
    ];

    // Operation to set the relation between the user and the document
    const relationOperation: any = {
      opCode: ImportOpCode.SET,
      msg: {
        case: ImportMsgCase.RELATION,
        value: userDocumentRelation,
      },
    };

    // Combine object and relation operations
    return [...objectOperations, relationOperation];
  }).flat();

  try {
    // Create an async iterable from the operations and import them to the directory service
    const importRequest = createAsyncIterable(operations);
    const resp = await directoryClient.import(importRequest);
    // Read and return the result of the import operation
    const result = await (readAsyncIterable(resp))
    return result
  } catch (error) {
    // Log and rethrow any errors encountered during the import
    console.error('Error importing request: ', error);
    throw error;
  }
}
Application
To enforce the relationship between user and the documents they have access to, we create a function which will perform a checkPermission call against the directory for a particular Permission:
export const getFilteredMatches = async (user: User | null, matches: ScoredPineconeRecord[], permission: Permission) => {

  // Check if a user object is provided
  if (!user) {
    console.error('No user provided. Returning empty array.')
    return [];
  }

  // Perform permission checks for each match concurrently
  const checks = await Promise.all(matches.map(async (match) => {
    // Construct permission request object
    const permissionRequest = {
      subjectId: user.id, // ID of the user requesting access
      subjectType: 'user', // Type of the subject requesting access
      objectId: match.id, // ID of the object access is requested for
      objectType: 'resource', // Type of the object access is requested for
      permission: 'can_read', // Specific permission being checked
    }

    // Check permission for the constructed request
    const response = await directoryClient.checkPermission(permissionRequest);
    // Return true if permission granted, false otherwise
    return response ? response.check : false
  }));

  // Filter matches where permission check passed
  const filteredMatches = matches.filter((match, index) => checks[index]);

  // Return matches that passed the permission check
  return filteredMatches
}
The permission checks for each subject, object and permission triple takes a fraction of a millisecond, which ensures the performance of the application overall.
This function is called in the getContext function, which retrieved the relevant documents and then filters the matches based on the permission we set.
export const getContext = async ({ message, namespace, maxTokens = 3000, minScore = 0.95, getOnlyText = true, user }:
  { message: string, namespace: string, maxTokens?: number, minScore?: number, getOnlyText?: boolean, user: User | null }): Promise<ContextResponse> => {

  // Get the embeddings of the input message
  const embedding = await getEmbeddings(message);

  // Retrieve the matches for the embeddings from the specified namespace
  const matches = await getMatchesFromEmbeddings(embedding, 10, namespace);

  // Filter out the matches that have a score lower than the minimum score
  const qualifyingDocs = matches.filter(m => m.score && m.score > minScore);
  let noMatches = qualifyingDocs.length === 0;

  const filteredMatches = await getFilteredMatches(user, qualifyingDocs, Permission.READ);

  let accessNotice = false

  if (filteredMatches.length < matches.length) {
    accessNotice = true
  }

  return {
    documents: qualifyingDocs,
    accessNotice,
    noMatches
  }
}
We want to make sure that the user is aware in case some of the documents that exist in the system are not available to them. For that purpose, we compare the number of overall found matches to the number of filtered matches. We also take note if no matches were found at all.
Finally, we just need to send the information back to the client. We’ll attached the access information to the data sent back as part of the context:
const { documents, accessNotice, noMatches } = context;
data.append({ context: [...documents as PineconeRecord[]],
        accessNotice,
        noMatches });
We’re now ready to test the authorization mechanism. In our application, we’ll log in using the identity we associated with the finance category, and as it about the finance department:
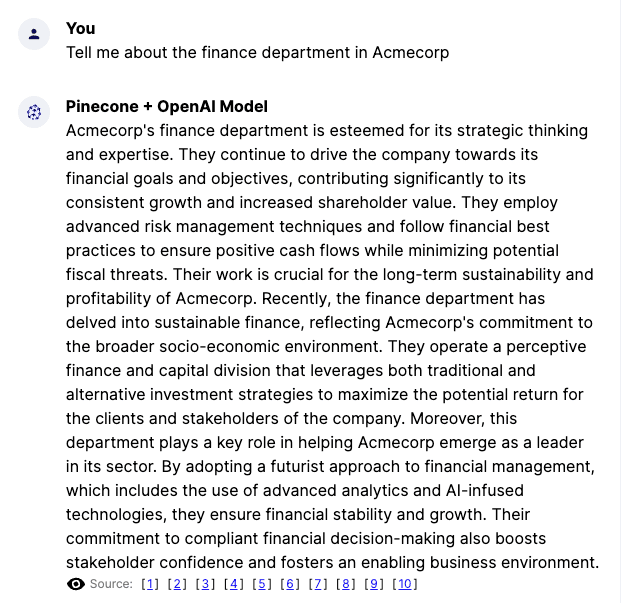
We’ll ask the same question but with the user associated with the hr category, who shouldn’t have access to finance related topics:

As expected, we get an indication that some results couldn’t be used to compose the question, and the content we did get didn’t actually have anything to do withe the topic of our question.
Summary
The significance of access control mechanisms within the realm of RAG applications can’t be understated. The task of managing sensitive information is no small feat, and that's where services such as Aserto and Clerk can make this process a lot easier. The prevailing authorization pattern for databases is to filter the results after the query is executed. In some cases, this might not be feasible, but in the RAG use case this is actually a great fit: we usually don’t query for more the tens of results at a time, and filtering through those using services like Aserto is completely feasible in terms of latency.